Showing posts with label FAQ. Show all posts

Thursday, April 16, 2020

iPhone SE is back! What can Apple expect from the Indian market after pricing it for Rs. 42500

As we all know, Apple released the iPhone SE (2nd generation or 2020 as people are calling it lately) for Rs. 42,500 by the means of a Press Release keeping in mind the prevailing situation throughout the world due to the outbreak of the Covid-19 pandemic. It was a well thought decision of not holding a event during this time.


Now coming to the point where I want to talk about the Indian markets in particular.

We have seen that the budget iPhone as we used to call it back then, the iPhone XR which launched in October, 2016


Let us evaluate the gains and losses of buying the SE over XR

Gains :-

  • Comes cheaper
  • Compact form factor suitable from small hands
  • Touch ID 
  • A13 Bionic Chip
  • WiFi 6 and advance 
  • Sapphire Crystal Lens cover for added protection against scratch
  • Portrait lighting with background effects for the camera


 Losses :-

  • Smaller Screen 
  • Less battery life as claimed
  • No Face ID


To sum this all up one can safely go for the SE even in 2020 as it is based on a design from apple that it continued from iPhone 6 on wards, with just minor changes here and there but running the latest iOS and would be supporting the future updates to the iOS as well. If you are into gaming and similar stuff like that which require a slightly bigger display, then considering the XR which would cost a couple of thousand bucks more than SE is not a bad option.

But the main point, that is, the difference in the pricing in USA ($399) which translates to Rs. 30631 and the launch price of India is more than Rs. 10,000 which I think is a way too much to ask for.


A humble pricing of Rs. 35,000 could have attracted even more audience towards Apple with this launch. But there could still be a cashback offer with specific brands like we saw with the iPhone 11 series which offered straight up discount of 7000 on the iPhone 11 if payment was made using HDFC Bank Card.

I will update this post as there is announcement of any Bank offers or best buy links as it will come to my knowledge, for anything else, comment down below.

PS: Trying to revive this blog once again. Please give me your support.

Saturday, May 23, 2015

How to enable .NET Framework in Windows 8 or 8.1 with or without internet access.

 Before moving forward to the steps of how to enable .NET Framework 3.5 in Windows 8 or Windows 8.1 with or without using Internet let us know what is .NET Framework.

.NET Framework (pronounced dot net) is a software framework developed by Microsoft that runs primarily on Microsoft Windows. It includes a large library and provides language interoperability (each language can use code written in other languages) across several programming languages. Programs written for .NET Framework execute in a software environment (as contrasted to hardware environment), known as the Common Language Runtime (CLR), an application virtual machine that provides services such as security, memory management, and exception handling. The class library and the CLR together constitute .NET Framework.

.NET Framework's Framework Class Library provides user interface, data access, database connectivity, cryptography, web application development, numeric algorithms, and network communications. Programmers produce software by combining their own source code with .NET Framework and other libraries. .NET Framework is intended to be used by most new applications created for the Windows platform. Microsoft also produces an integrated development environment largely for .NET software called Visual Studio.

Now here are the Prerequisites and step-by-step tutorial for enabling .NET Framework 3.5 in Windows 8 or Windows 8.1 with or without using Internet


Enabling .NET Framework 3.5 in Windows 8 or Windows 8.1 by using Internet
Prerequisites for enabling .NET Framework 3.5 in Windows 8 or Windows 8.1 by using Internet are:-


1.       Windows 8 or Windows 8.1 PC
2.       Internet Access

Note: The .NET Framework 3.5 file is of approximately 231 MB, so make sure to use Wi-Fi or Unlimited Internet Connection or a Dial-Up Connection with at least 300 MB (I have mentioned 300 MB here for safety purpose).
The steps to enable .Net Framework 3.5 in Windows 8 or Windows 8.1 by using Internet are:-


1.       Go to Control Panel
2.       Click on Programs
3.       Click on Programs and Features
4.       Click on Turn Windows features on or off
5.       Check the box where it is written .NET Framework 3.5 (includes .NET 2.0 and 3.0)
 
Note: The box should be filled instead of a tick mark


6.       Click on Ok
7.       Now let Windows download and enable the required files (It is preferred to keep the PC idle till the download and installation is complete)
8.       Once it is enabled, click on Close.

Enabling .NET Framework 3.5 in Windows 8 or Windows 8.1 without using Internet
Prerequisites for enabling .NET Framework 3.5 in Windows 8 or Windows 8.1 without using Internet are:-

1.       Windows 8 or Windows 8.1 PC
2.       Windows 8 or Windows 8.1 DVD or ISO

Note: The DVD or ISO used must be Original or if the ISO is downloaded from a 3rd Party site, then make sure that the ISO is Untouched (which means it should not be an All-In-One ISO or a Two-In-One ISO). Even the Architecture of the DVD or ISO should be same as that of the Windows installed on the PC (which means that if the Windows installed is of 32bits (x86) then the DVD or ISO must also be of 32bits (x86) and this is the same for 64bits (x64) Windows).
The steps to enable .NET Framework 3.5 in Windows 8 or Windows 8.1 without using Internet are:-

1.       Go to Computer or This PC
2.       Check the Drive Letter of the Windows 8 or Windows 8.1 DVD or where the ISO is mounted.
3.       Now run Command Prompt as Administrator (Press Windows Button + X and then Select Command Prompt(Admin))
4.       Type: "Dism.exe /online /enable-feature /featurename: NetFX3 /all /Source:X:\sources\sxs /LimitAccess" without "".

Note: There should be spaces as given above. If spaces are missing, Command Prompt will show an error. Above ‘X’ is the Drive letter of the Windows 8 or Windows 8.1 DVD or where the ISO is mounted. 

5.       After typing hit the Enter button.
6.       After completion, you will see a Windows telling that .NET Framework 3.5 is installed.
7.       Click on OK
8.       Now Go to Control Panel
9.       Click on Programs
10.   Click on Programs and Features
11.   Click on Turn Windows features on or off
12.   You will see that the Check box where it is written .NET Framework 3.5 (includes .NET 2.0 and 3.0) is filled. This means that .NET Framework 3.5 is successfully enabled in your PC.

If you want to enable all the features of .NET Framework 3.5 which are Windows Communication Foundation HTTP Activation and Windows Communication Foundation Non-HTTP Activation then click on the check box, the tick mark will appear in both the check boxes as well as in the .NET Framework 3.5 (includes .NET 2.0 and 3.0) Box.

As .NET Framework 3.5 is already installed, Windows won’t connect to internet to enable those features and the features will be turned on.


Sunday, August 10, 2014

How to run 2 WhatsApp numbers in one unrooted Android Mobile using OGWhatsApp

WhatsApp Messenger is a cross-platform instant messaging subscription service for smartphones and selected featured phones that uses the internet for communication. In addition to text messaging, users can send each other a Phonebook contact as an attachment and Multiple Media Messages like images, video, and audio clips as well as their location using integrated mapping features.

OGWhatsApp is a modded (modified) version of the WhatsApp Messenger for Android that allows to use 2 numbers of WhatsApp in one device and that also without having root access to your device and they both work in one time and you will get other notifications too. It is available just for Android in APK (*.apk) format.

Features of OGWhatsApp are:-

·         Use 2 mobile phone numbers in one device that is available only for one platform, that is, Android.
·         Copy Contacts Status
·         Take Backup of Data and Restore it
·         Choose launcher icon and Notification Bar icon
·         Preview images without saving it locally, that is, on Phone memory (Internal/External)
How to install OGWhatsApp:-
·         Start WhatsApp Messenger
·         Go to Settings
·         Then Chat settings
·         Touch Backup conversations (It will start backing up your messages and save it on the External SD card)
·         Close WhatsApp Messenger
·         Go to System Settings > Apps > WhatsApp >
·         Touch Clear Data
·         Close System Settings
·         Open File Manager (You can also use ES File Explorer)
·         Go to External SD card >
·         Select WhatsApp and rename it as “OGWhatsApp”
·         Now go to Download (or the location you have saved the downloaded APK of OGWhatsApp)
·         Install it
·         Open App Drawer and Launch OGWhatsApp
·         Provide your number which you were using previously for the WhatsApp Messenger
·         It will say that “Message backup found! Would you like to restore you message history from Backup?” You now choose “Restore”
·         It will now ask you to provide your name and an optional profile photo. Assign your name and add profile photo according to your wish
·         Touch on Next
·         It will say “Welcome to OGWhatsApp!” Touch on Continue
·         Now your OGWhatsApp number is set
·         For the time being Close OGWhatsApp
·         Open App Drawer and Launch WhatsApp
·         Provide your number which you want for your WhatsApp Messenger
·         It will say that “Message backup found! Would you like to restore you message history from Backup?” You now choose “Restore” You can also choose “No Thanks” as this is your other number
·         It will now ask you to provide your name and an optional profile photo. Assign your name and add profile photo according to your wish
·         Touch on Next
·         It will say “Welcome to WhatsApp!” Now Touch on Continue
·         Now your WhatsApp number is set

·         Voila! Now you can now enjoy using two numbers in one device

Note:-
·         Do not install OGWhatsApp before renaming the original WhatsApp folder.
·         Do not provide any other number other than the number which you were previously using for WhatsApp
·         During the restoration of messages in WhatsApp Messenger (Not OGWhatsApp) it may show an error.

Download links:-


WhatsApp

Wednesday, June 4, 2014

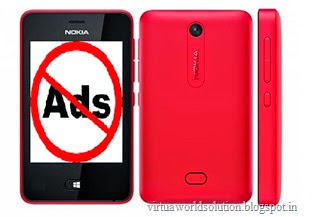
How to Remove Advertisements from Apps/Games in Asha 5XX phones

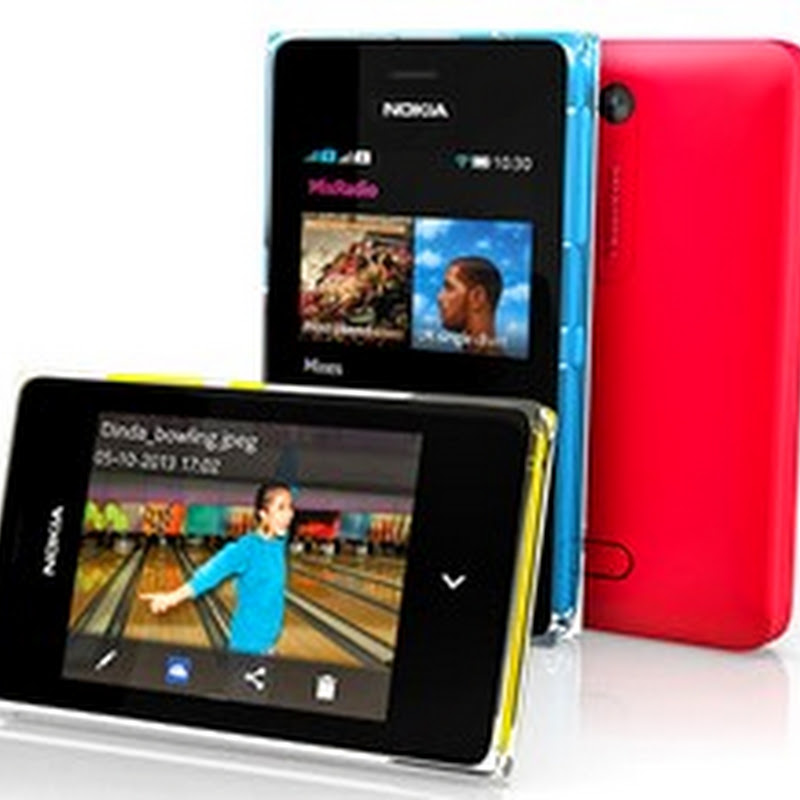
asha 501 no more ads in gamesNokia Asha OS is a much advanced version of Nokia’s Series 40 OS for feature phones. These phones are equipped with the features of smartphones at the price that fits everybody’s budget. This revolutionary move by Nokia started with the launch of Asha 501 and now has 5 variants in this row. Tons of apps are available for this platform in Nokia Store. Nokia is providing a huge opportunity for developers to reach the world. Store has a wide reach all over the world and helps developers to attain downloads for their products. There are mainly three methods for developers to earn,
  1. 1. A paid app
  2. 2. A free app with in-app payment
  3. 3. A free app
Apart from these, a developer can include Ads in his app. This is also a major source of income for the developer. With this feature , the app/game will display an advertisement when the user opens the app. But to run the app, it requires a working internet connection. In case of games, The game can’t be played if there is no data pack active. And for a user of a budget phone like Asha, will find it hard to use data packs as the network providers are making it costlier day by day. And these useless advertisements irritates me a lot too.

So this is a tutorial to remove the Advertisements and skip to the game directly. This can be done in three easy steps, completely in the mobile itself. I strongly recommend you to use use UC Browser (Download) for this.

Steps for removing Ads. from Apps/Games

First and foremost, create a new folder in your memory card, say My Folder.
(If you are in UC Browser now, you can create a New Folder without closing it.
Simply go to Downloads > Menu > FileManager > Memorycard > create New Folder)

1. Open Nokia Store in a new tab in UC Browser. Search for the Game you wish to remove ads. For example, Let the game’s name be AngryBirds and press . In the ‘Download Notice’ page press SAVE and save it to My Folder. Now you have downloaded the JAD file of the Game and it will be downloaded as ‘AngryBirds_240x320_jad’. Now close the tab.

download screenshot uc browser

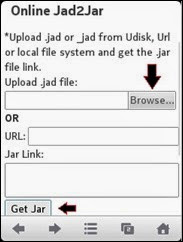
2. Open this LINK in a new tab and upload the file (AngryBirds_240x320_jad) to its server. You will get a link to download the JAR file of the game (AngryBirds_240x320.jar) in the next page. Now download the file just like you downloaded the JAD file, save it to MyFolder. Wait for the file to get fully downloaded and the file will be named like ‘AngryBirds_240x320_jar’. Now close the tab.

screenshot uc browser asha 501

3. Open this LINK in new tab and upload the jar file to the site. Wait sometime for the file to get uploaded and in the next page you can download the file ‘AngryBirds_240x320_Ad_Removed_jar.

screenshot uc browser asha 501

Now simply rename the file (AngryBirds_240x320_Ad_Removed_jar) to (AngryBirds_240x320_Ad_Removed.jar). Before you close the browser and start playing your game, Please like us on facebook !!

Saturday, May 31, 2014

Increase your battery backup without using any battery-saver apps in Android

battery love

Google’s Android is the largest installed mobile OS in the world. Its devices also sell more than Windows, iOS and Mac OS combined. Its a low-cost and customizable OS which makes it preferable among manufacturers. It is an Open Source platform based on Kernel Linux and is used by many major mobile/tablet manufacturers including Samsung, HTC, LG, Sony and Microsoft Mobile(Nokia) recently. Android phones range from budget phones like Samsung Galaxy Star, Micromax Bolt Series, Motorola E, Nokia X etc to high end smart phones like Galaxy S5, Xperia Z2, HTC M8 and so on.

Android smartphones are equipped with high quality graphical display, 3G/4G connectivity, Wireless Fidelity, a good amount of RAM, Multitasking capability and many other features that requires a lot of battery backup, thus draining the battery soon. This is the main drawback of Android. There are hundreds of battery saver apps available in Google Play Store for reducing the battery usage in your phone. These apps can help you save your battery to a great extent, but still it depends on the usage of the phone.

Here are some important  measures you must follow apart from using battery saver apps. These tips are provided by CheetahMobile, the developers of the popular Clean Master app.

TIPS FOR REDUCING THE BATTERY USAGE IN YOUR ANDROID -

1. Disable automatic time zones/time and the clock manually otherwise your device will  l constantly be requesting location/time data and its almost entirely unnecessary.

2. Reduce the push frequency of email/weather/social media.

3. Disable Wi-Fi/Data while playing offline games which present ads, for many apps they will be unable to push you ads during gameplay without a connection.

4. Try to charge the battery before it falls below 20 per cent, it's not good to run them completely dry.

5. Use the official chargers for your devices, an aftermarket charger may not charge at the correct voltage or have other deficiencies.

6. Charging via a power outlet is often times much more effective than charging via USB.

7. When you are done with an app try to actually shut it down instead of pushing it to run in the background.

8. Try to avoid playing graphically intense games while charging.

9. Switch off or use flight mode in places where the network is weak.  

Friday, May 30, 2014

How to Create your own Wi-Fi hotspot and share your Internet over other Wi-Fi enabled Devices


Having a WiFi connection at home is cool. But having a WiFi connection without paying for an external WiFi modem sounds even more cool. As u know a WiFi connection enables you to access internet wirelessly on your WiFi enabled mobiles, tablets, laptops etc. Now most people have access to internet in their PCs(broadband or a dial-up connection) and smartphones.  Many pay for their internet separately for each devices. As a way to reduce your expense on internet, the data you access on your PC can also be shared to your smartphones, at no cost. The below mentioned applications will help you to do so.

Requirements-
*A WiFi enabled PC/Laptop with a decent internet connection.
*A smartphone/PDA that has WiFi.
*Any one of the below mentioned software.

Virtual WiFi router

Virtual WiFi router turns any WiFi-capable PC into a WiFi  router that shares the internet connection to other devices wirelessly. It has a simple and friendly user interface which makes it easy to use. The application can be minimized into the tray. It runs on almost all Windows platform.
Download (Official)

Thinix

Thinix works by creating a virtual hotspot using wireless adapter in your windows pc. It allows you to pay for one internet connection and share that for all your devices which has a WiFi. It has a built-in WPA2 encryption, pin code protection and auto key generation. Compaitable with win7,8. The shared WiFi is secure and temporary if u use the PIN code protection and auto-key generation feature.
Download (Official)

[Control Windows Media Player without touching your Computer]

Connectify

Connectify transforms your laptop into a real WiFi hotspot, sharing any available internet connection to others. It is the best and most used one. It can also act as a repeater for your home router because it re-broadcasts the home WiFi. It displays all connected nodes so you can view all connected devices to your connectify hotspot. It has a free and paid version for download. In free version you have no option to change the SSID(default ID is ‘Connectify Hotpot’).
Download (Official)

mHotspot

mHotspot is a completely free software for which performs the same as others. You can connect upto 10 devices at the same time and set your desired name as SSID. The application size is just 400kb  and has an in-app internet selection. mHotspot is available for both Windows and Android.
Download (Official)

Connec8

Connec8 can’t compete with the friendly GUI of others because It follows a command line interface. But comparatively it’s the best. It has all the features I said above and moreover its totally free. If you are okay with its interface, I personally recommend, simply go for it.
Download (Official)

[Lock your PC with just a Pendrive]

All the above ones does the same job. For serious use I recommend Connectify. In my case I use Connec8. Apart from the bad user interface, it satisfied all my needs.
Comparison


Wednesday, May 14, 2014

How to Root & install Google PLAY Store in Nokia X Android Phone

Android is android and for all those who wanted to install the Google Apps Package and root the all new Nokia X Android Smartphone can now do the same. While Nokia unveiled 3 new android Smartphones which were Nokia X, Nokia X+ and Nokia XL in the recent Mobile World Congress event. The rooting has been achieved for Nokia X android device which will allow users to side load the Google PLAY Store and also other android apps like Google Now launchers etc. So after checking out the detailed list of quick pre requisites, you can now proceed on to check on what are the instructions with which you can apply the update.

Quick Pre Requisites:

·         Don’t use any PC tools for backing all the data present in your Nokia X Android Smartphone.
SMS – Currently there is no automated way to backup SMS
Contacts – Sync with the Outlook application,
Images, Songs, Videos, Files – Copy to internal / External SD Card,
APN and MMS Settings – Note down from the path “Applications > Settings > Wireless and Network > Mobile Networks > Access Point Names

·         Enable the USB Debugging Mode in your computer from the path “Settings > Applications > Development > USB debugging”. Also, the minimum battery life should be a minimum of 40% or else there is a risk of device getting Turned Off in the middle of firmware update.

·         For applying this custom ROM firmware, you need to make sure that your Note 3 is rooted. To check whether your Galaxy Note 3 Android phone is rooted or not, you will have to check the same from Root Checker app.

Procedure to Root Nokia X Android Phone:-

  • Download the Rooting APKGoogle Apps APKs in your computer and place the same in your Nokia X Android phone. After downloading the zip package, all you need to do is to unzip to get the APKs.
  • Connect your device to the computer with the help of original USB cable and place the APKs in your device.
  • With the help of file manager app, head over to the placed APK and tap on the same to follow on screen instructions and root your Nokia X android Smartphone.

  • Up next, head over to the Google Apps APKs which you have placed in the device to /system/app and change permissions for this files in the device.
  • Up next, you need to install the Google Apps Package which you have earlier placed in the device.
  • Now, all you need to do is to just open the Google Play Store app in your Nokia X android phone after which it will ask you to add your Google Account.

Thursday, April 3, 2014

How to Activate your sim card instantly

When you buy any new sim card, the shopkeeper will tell you to wait for few hours/days to get the sim
 card activated.
When you purchase a new sim card you will get two or three papers in which you have to fill the details.
Check the page in which your mobile number is written and near your number you can see SR NUMBER [serial number].
You can also find SR. No. on sim card's slip on plastic cover.

If you want instant activation then insert your sim card in your Mobile and then Dial the Serial Number two times.
Thats all. Your sim card will be activated within one minute.

How to Remove Shortcut Virus from Pendrives and Memory Cards without Antivirus

Follow the below Steps:-

*Go to Start -> Run -> cmd.
Or just open Command Prompt as Admin

*Go to your pen drive, memory cards or even mobile phone directory.

*Type "attrib -h -r -s /s /d e:\*.*"

*Replace "e" with your drive letter.

*And then press Enter.

NOTE: Make sure to Backup your important documents from the Pendrives or Memory Cards before running the commands. 

How To Use Android Mobile Phone As Webcam

This is a tutorial of How To Use Android Mobile Phone As Webcam.

Note: In-order to use this application you will need a Wi-Fi connection on your mobile device

The things we need:-

IP Webcam application (free)
IP Camera Adapter (free)
Chrome or Firefox Browser (free)

The steps to use Android Mobile as a Webcam are:-

Step 1:First of all install the downloaded IP Webcam application on your android mobile phone. Also install the IP Camera Adapter on your PC.

Step 2:Now open the installed IP Camera app on your phone after it you will many options like username, password, screen resolution and many more which you can adjust according to your choice. Now after doing so just click on the Start Server.

NOTE : This app uses back camera as default foe better quality but you can also change camera mode to front but it will reduces your video quality.

Step 3:Now when you clicks on the start server then after that you will see a IP at the bottom of mobile's screen. Now open this IP in your mobile's Chrome or Firefox browser. If none of these browser is installed on your android mobile and select Browser built-in viewer option.

Step 4: Now open and install the downloaded IP camera adapter on your PC. Now in the "Camera feed URL"just enters your IP and port which you got from the app you installed on your phone and remember don't delete /videofeed and then click on "Autodetect".

Step 5: Now that's it your are done. Open any video conferencing application on your PC like Skype,Facebook messenger, Yahoo ! messenger and you will see the video streaming on your PC from your android mobile phone"

Now open any video conferencing tools like Skype, Google Hangout or Facebook messenger and you must see your video streaming from the Android phone camera on your computer. The application uses the secondary camera of your mobile phone as default and that’s because the secondary camera will have more clarity when compared toward the front facing camera.

Friday, March 7, 2014

RAM and SAM

Don’t worry I am not going to say about the names RAM and SAM but going to explain the two computer related terms, RAM and SAM to you.
RAM (Random Access Memory) is really the main storage and is the place where the programs and software we load gets stored. When the CPU (Central Processing Unit) runs a program, it fetches the program instruction from the RAM and carries them out. If the CPU needs to store the result of calculations, it stores them in RAM.
RAM can have instructions READ from it by the CPU and also it can have numbers or other computer data WRITTEN to it by the CPU. When we switch off, whatever is stored in the RAM gets erased.

RAM is best known form of a computer memory. RAM is considered ‘random access’ because anyone can access any memory cell directly if we know the row and column that intersect at the cell. The opposite of RAM is SAM (Serial Access Memory). SAM stores data as a series of memory cells that can be only accessed sequentially (like a cassette tape). If the data is not in the current location then the memory is checked until the needed data is found. SAM works very well for memory buffers, where the data is normally stored in the order in which it will be used (a good example is the texture buffer memory on a video card). RAM data, on the other hand can be accessed in any order.

Tuesday, March 4, 2014

Why Hyper Links are Blue?

Ever wondered why hyperlinks are blue? Sir Tim Berners-Lee, inventor of World Wide Web, chose the color because it was the darkest color available that would not blend in with black text.

Monday, March 3, 2014

Where are the words added to Dictionary Stored?

Have you even wondered where the words are stored after being added to dictionary? Well I know exactly where those words (Those added to dictionary) are stored in Windows® 7, Windows® 8 and Windows 8.1.

The things you have to do are:-
·         Boot your Computer with an Administrator account
·         Go To Computer/ This PC (In Windows 8.1)
·         Click on View/ Organize
·         Click on Options/ Folder and search options
·         Folder Options will come, Click on View Tab
·         Check ‘Show hidden files, folders and drives’
·         Click on Apply
·         Click on OK
·         Press  + R, Run will appear.
·         Type ‘Appdata
·         Double Click ‘Roaming
·         Double Click ‘Microsoft
·         Double Click ‘UProof’. This folder contains the notepad which stores the Added words
·         Double Click ‘CUSTOM’. This the notepad file which contains all the added words

A notepad file will open which contains all the words which are added to dictionary!!!

Note:-
·         Do not delete or move (Cut) any file or folder from that Directory.
·         You must have any Microsoft Office 2007, Microsoft Office 2010 or Microsoft Office 2013.
·         ‘UProof’ folder will not be present if you have not yet added any work(s) to the Dictionary.

No snapshots added to reduce data usage for people having Limited Data Connections